1. Data acquisition
Danger
This tutorial is out of date. Please check the tutorials overview for our latest tutorials.
You start this tutorial by streaming data into a topic. Starting with the data feed enables you to verify that the code and services you build and deploy are working properly.
You have two options for this stage:
-
Stream data from your Android phone with the Quix Companion app.
-
Stream prerecorded CSV data.
You only need to set up one of these data sources for the purposes of this tutorial, although you are welcome to step through both approaches.
Quix companion app
External source
To get started with these steps you first need to add a Topic and pipeline placeholder called an external source.
An external source is a representation of a data source that is external to Quix, for example an IoT device or a service that is pushing data to a Quix topic using one of our API's.
To add an external source:
- Go to the pipeline view.
- Click
+ Newin the top right corner of the view. - Select
External source. - In
Outputselect the topic you are going to publish to, or add a new topic with+ Add new. In this case select thephone-datatopic. - In
Nametype any suitable name, such as "Quix companion web gateway". - Click
Add external source.
Install and configure the apps
To stream data from your phone you’ll need to install the Quix Companion App on your Android phone and deploy the QR Settings Share app to your Quix environment.
Follow these steps:
-
Install the
Quix Companion Appfrom the Google Play Store.
-
Open the app and navigate to the
Settingspage via the menu. -
Click the
SCAN QR CODEbutton at the top of the settings page. Now continue to follow these steps. When directed, in step #17, you will scan the QR code using the Quix Companion app. -
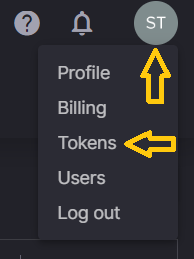
In the Quix UI, click the user icon in the top right of the browser.
-
Click
Tokens. -
Generate a token with any name and allow at least a few days before it expires.
-
Copy the token to your clipboard or somewhere safe.
-
Navigate to the
Code Samplesand search forQR Settings Share. -
Click
Deploy. -
Paste the token into the
tokenfield. -
Click
Deploy. -
Open the QR Settings Share by clicking the "open in new window" icon.

-
Enter a name and a device identifier into the input fields.
-
These can be any value such as your name and CAR-001.
-
Click
Generate Token. -
A QR code will be generated and presented to you in the UI.

-
Scan the QR code using the Quix Companion App.
The app has now been configured with the access token, allowing it to communicate with Quix.
-
Ensure the rest of the fields are configured as follows:
a. Topic field is set to
phone-data.b.
Notifications Topicfield is set tophone-out.c.
DeviceIdfield is set to your chosen device identifier.d.
Rideris set to your name.e.
Teamhas a value. For exampleQuix. -
Select
Dashboardfrom the menu. -
Click the
STARTbutton.This will open a connection to your Quix environment and start streaming data from your phone.
Verify the live data
Follow these steps to ensure that everything is working as expected:
-
In the UI, navigate to
Data Explorer. -
Ensure you are on the
Live datatab. -
Under
Select a topicselectphone-data. -
Under
select streamsselect the active stream. This should be the only stream that exists. -
Under
select parameters or eventsselectgForceX,gForceYandgForceZ. -
The waveform view should display the live g-force data from your phone.
-
Move or gently shake your phone and notice that the waveform reflects whatever movement your phone is experiencing.
Success
You have connected the Quix Companion App to your environment and verified the connection using the Live Data Explorer.
CSV data
If you don’t have an Android device, or you’d rather stream some data provided for you, then use this data source.
Follow these instructions to deploy the data source:
-
Navigate to
Code Samples, selectPythonunder languages andSourceunder pipeline stage. -
In the search box enter
Starter source. -
On
Starter source, clickPreview codethenEdit code. -
Change the
Namefield toCSV data source. -
Change the
outputfield tophone-data. -
Click
Save as Application. -
Open the
requirements.txtfile and addurllib3to a new line. -
Open the
main.pyfile and replace the code with the following code:import quixstreams as qx import time import os import pandas as pd from urllib import request # Quix injects credentials automatically to the client. # Alternatively, you can always pass an SDK token manually as an argument. client = qx.QuixStreamingClient() # Open the output topic where to write data out topic_producer = client.get_topic_producer(topic_id_or_name = os.environ["output"]) # Set stream ID or leave parameters empty to get stream ID generated. stream = topic_producer.create_stream() # download data.csv # if you want to use your own data file just comment these lines # and place your data.csv file in the same folder as main.py f = request.urlopen("https://quixtutorials.blob.core.windows.net/tutorials/event-detection/data.csv") with open("data.csv", "wb") as data_file: data_file.write(f.read()) df = pd.read_csv("data.csv") for col_i in ['device_id','rider','streamId','team','version']: df = df.rename(columns={col_i: "TAG__" + col_i}) print("Writing data") seconds_to_wait = 0.5 while True: for i in range(len(df)): start_loop = time.time() df_i = df.iloc[[i]] stream.timeseries.publish(df_i) print("Sending " + str(i) + "/" + str(len(df))) end_loop = time.time() time.sleep(max(0.0, seconds_to_wait - (end_loop - start_loop))) qx.App.run()Info
The code:
-
Connects to Quix.
-
Opens the CSV file using Pandas.
-
Renames some columns so Quix Streams streams them as tags.
-
Then streams each row to the
phone-datatopic. -
It does this continuously so stop the service when you have completed the tutorial.
-
-
Test the code by clicking
runnear the top right corner of the code window.With the code running you see messages in the
Consoletab: -
Click the
Messagestab and you see the raw messages being streamed to thephone-datatopic. -
Click one of the messages and you see the raw data in JSON format.
Your data should look like JSON
Note, depending on which row you click, you may see slightly different results. Only some rows contain location data.
"Epoch": 0, "Timestamps": [ 1673966764000000000 ], "NumericValues": { "Longitude": [ 0.52202169 ], "Latitude": [ 51.73491702 ], "Speed": [ 98.0639991760254 ], "Heading": [ 347.5 ], "BatteryLevel": [ 0.27 ], "Altitude": [ 59.63983154296875 ], "Accuracy": [ 3.790092468261719 ] }, "StringValues": { "EnergySaverStatus": [ "Off" ], "BatteryState": [ "Discharging" ], "BatteryPowerSource": [ "Battery" ] }, "TagValues": {} } -
Stop the code by clicking the same button you clicked to run it.
-
You now deploy the code as a service, so it stays running when you navigate around in the UI.
-
Click
Deploy. -
On the dialog, click
Deploy.Once deployed, the service starts and data is streamed to the
phone-datatopic.