Quix CLI Quickstart
In this guide you will use the Quix CLI to create a simple streaming pipeline, and test it locally by running it in Docker. The pipeline generates telemetry data from a car and processes it to send an event whenever the driver applies a hard brake.
You will learn how to:
- Install Quix CLI: Get the CLI tool up and running on your local machine.
- Verify Dependencies: Ensure you have all necessary tools like Docker and Git.
- Initialize a Quix Project: Set up your project directory and configuration files.
- Create Source and Transform Applications: Build applications to produce and process data.
- Run and Manage Your Pipeline: Run your pipeline locally using Docker and manage it through the Quix CLI.
By the end of this guide, you'll have a fully functional data pipeline running locally. Let's get started!
Prerequisites
This guide assumes you have the following installed in your local machine:
Step 1: Install Quix CLI
To install Quix CLI:
For further details on installation, including instructions for Microsoft Windows, see the install guide.
Tip
To update Quix CLI just run quix update to get the latest version.
Step 2: Verify dependencies
This guide requires you to have certain dependencies installed. These include Docker or Docker Desktop and Git.
To verify you have the dependencies installed, run the following command:
View the output carefully to confirm you have Git and Docker installed:
Step 3: Create a GitHub repository
Create a new Git repo on GitHub to store your project files.
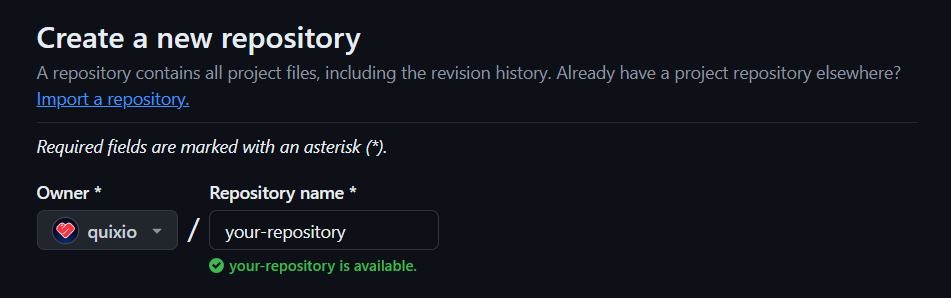
Initialize the repo with a README.md file to make it easier to clone.

If you encounter any issues creating your GitHub repository, refer to this documentation on Github.
Step 4: Clone your GitHub repo into your local project directory
Copy your GitHub repository URL.
Now, clone the repository using the URL. For example:
Tip
Replace <your-username> and <your-repository> with your actual username and repository name.
If you encounter any issues cloning your GitHub repository, refer to this documentation on Github.
Note
Ensure your GitHub account is correctly configured in your Git client to push changes to the remote repository.
Step 5: Initialize your project as a Quix project
Change into your project directory:
In your Git project directory, enter quix init. This initializes your Quix project with a quix.yaml file, which describes your Quix project. As a convenience a .gitignore file is also created for you, or if one is present it is updated to ignore files such as virtual environment files, .env files, and so on.:
If you look at the initial quix.yaml file you'll see the following:
# Quix Project Descriptor
# This file describes the data pipeline and configuration of resources of a Quix Project.

metadata:
  version: 2.0

# This section describes the Deployments of the data pipeline
deployments: []

# This section describes the Topics of the data pipeline
topics: []
You can see there are currently no applications (deployments) or topics.
Note
The quix.yaml file defines the project pipeline in its entirety.
Step 6: Create a source application
Now create a source application that will ingest simulated telemetry data into the broker as if it were coming from a real car in real-time:
When prompted, assign it a name of demo-data-source.
This creates a demo data source for you. A directory has been created for this application, along with all the necessary files. You can explore the files created with ls.
Step 7: Create a transform application
Now let's create a simple transform application. This application will read data from the source and will generate a message when a hard braking is detected:
When prompted, assign it a name of event-detection-transformation.
This creates the transform for you. A directory has been created for this application, along with all the necessary files. You can explore the files created with ls.
Step 8: Update the deployments of your pipeline
Update the deployments of your pipeline with the newly created applications of the project:
This command adds or updates the deployment configuration of your pipeline based on the default configuration of the existing applications in the project.
Tip
Typically, each application corresponds to a single deployment (1:1). However, the system supports multiple deployments for a single application within your project (1:N)
Now, view your quix.yaml file again to see how a deployment for each application has been added:
# Quix Project Descriptor
# This file describes the data pipeline and configuration of resources of a Quix Project.

metadata:
  version: 2.0

# This section describes the Deployments of the data pipeline
deployments:
  - name: demo-data-source
    application: demo-data-source
    deploymentType: Service
    version: latest
    resources:
      limits:
        cpu: 200
        memory: 500
      replicas: 1
    variables:
      - name: output
        inputType: OutputTopic
        description: Name of the output topic to write into
        required: true
        value: f1-data
  - name: event-detection-transformation
    application: event-detection-transformation
    deploymentType: Service
    version: latest
    resources:
      limits:
        cpu: 200
        memory: 500
      replicas: 1
    variables:
      - name: input
        inputType: InputTopic
        description: This is the input topic for f1 data
        required: true
        value: f1-data
      - name: output
        inputType: OutputTopic
        description: This is the output topic for hard braking events
        required: true
        value: hard-braking

# This section describes the Topics of the data pipeline
topics:
  - name: f1-data
  - name: hard-braking
Notice that the quix.yaml file has been updated with the variables defined in the app.yaml files located in each application folder.
You can also view a graph representation of your local pipeline with the following command:
This command will open a graphical representation of the pipeline in your default web browser:

If, for any reason, the CLI fails to open your browser and detects that Visual Studio Code (VS Code) is installed, it will automatically open the pipeline visualization in VS Code instead.
When you update your quix.yaml using the command quix pipeline update, the visualization is updated for you.
Step 9: Run your pipeline
Run your pipeline in Docker:
This command generates a compose.local.yaml in the root folder of your project based on your quix.yaml file.
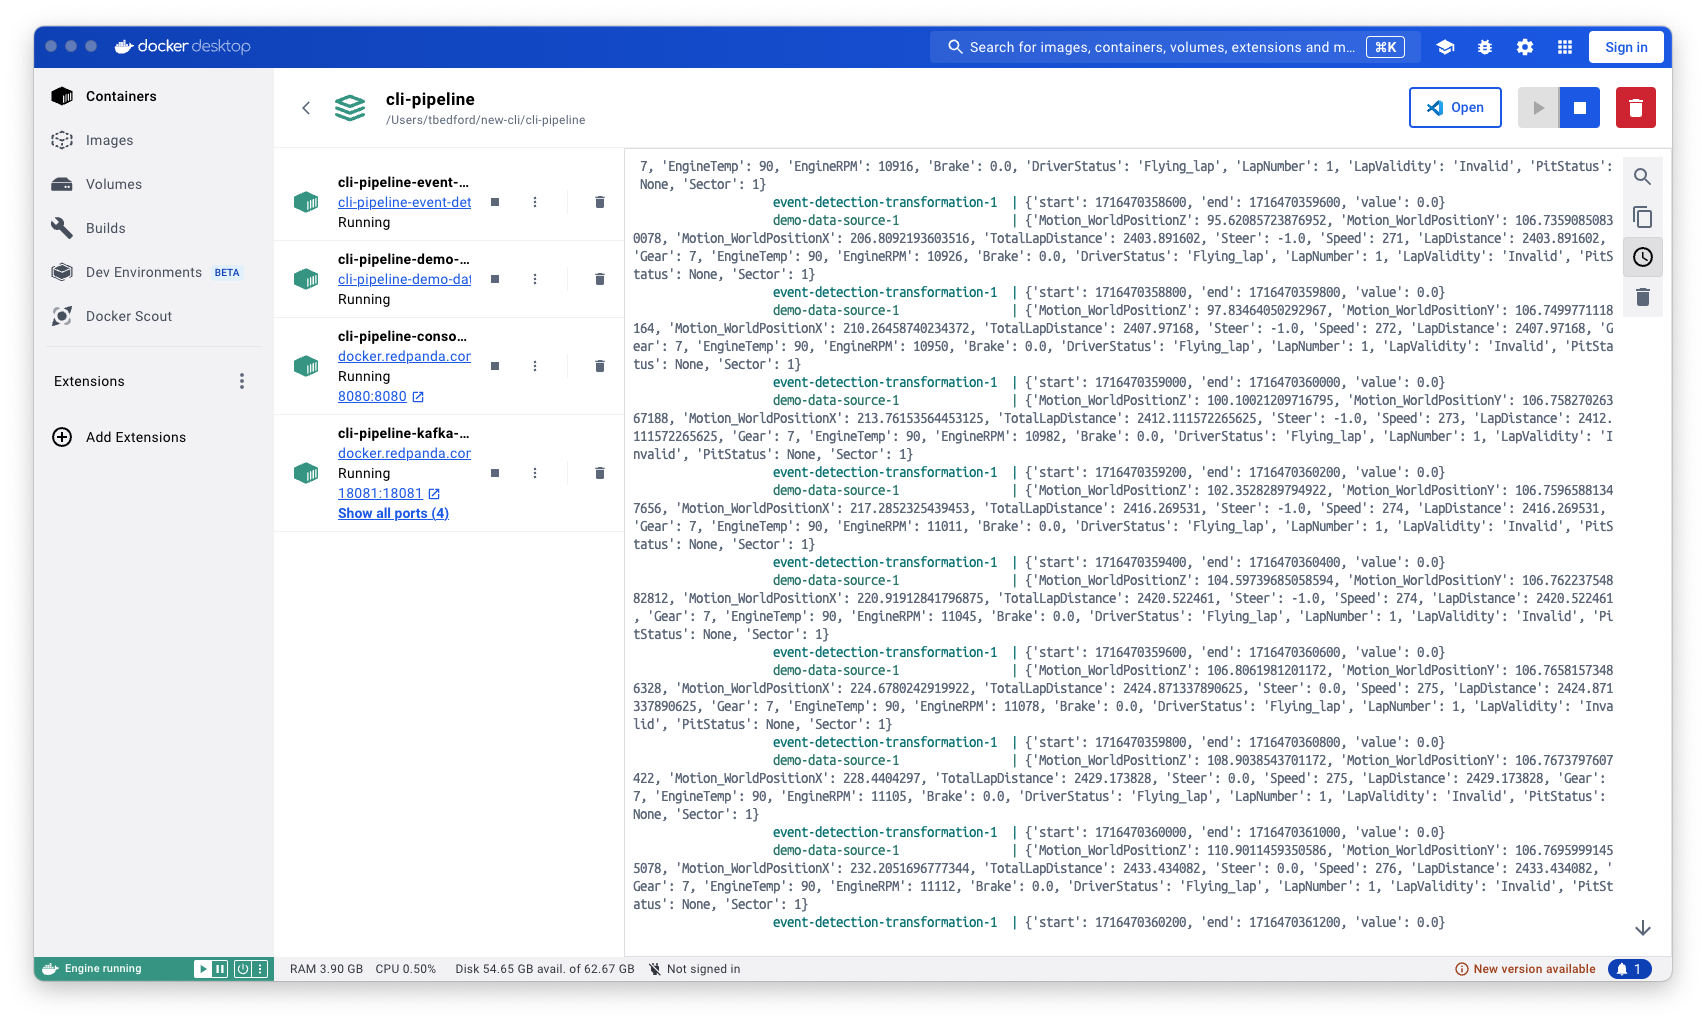
You'll see various console messages displayed in your terminal. When these have finished, then your deployed services are running in Docker.
Now switch to Docker Desktop and view the containers of the pipeline running:
You can also click on a Event Detection container and check its logs:
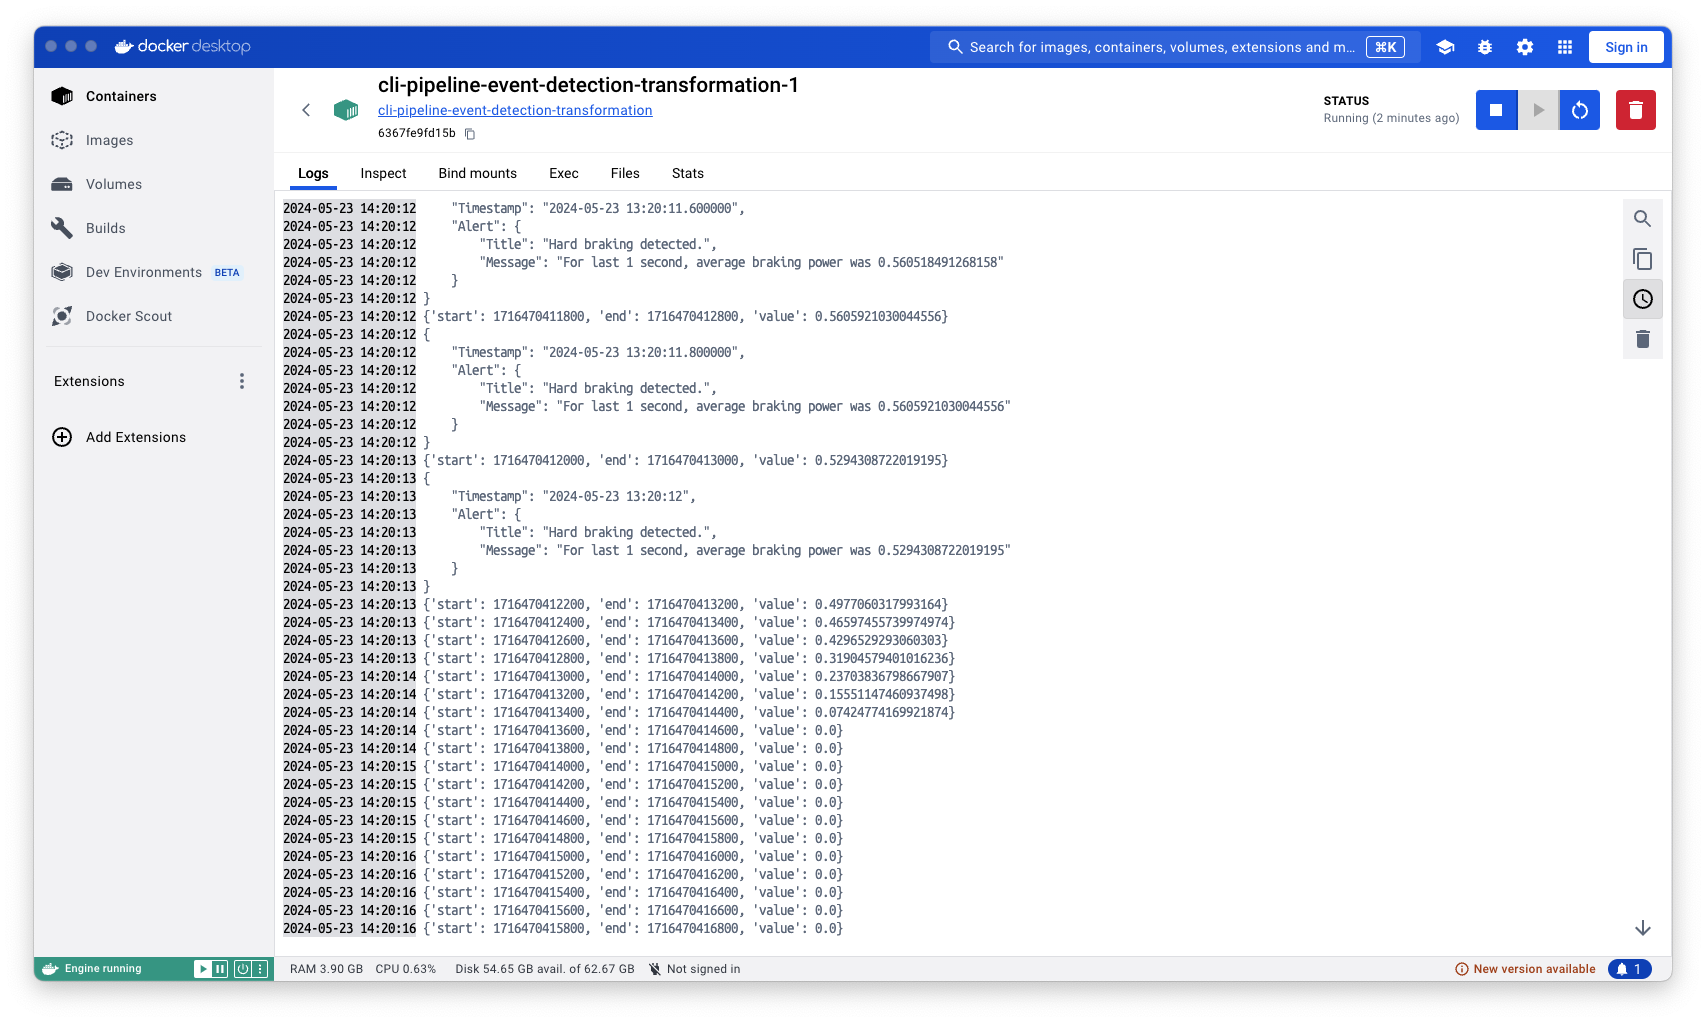
You can see that hard braking has been detected!
Tip
A detailed explanation of the applications code is beyond the scope of this guide. However, you can read more about Quix Streams library here.
Step 10: Push your local pipeline to Github
To push your changes to Git, and sync your pipeline to Quix Cloud, enter:
This pushes all changes to your Git repository. If you view your repository in your Git provider (for example GitHub), you'll see your files have been pushed.
This command also synchronizes your Git repository with Quix Cloud. But, at this stage you do not have Quix Cloud available, so you will receive the following error message:
Are you ready to level up?
Quix Cloud offers a robust and user-friendly platform for managing data pipelines, making it an ideal choice for organizations looking to streamline their development processes, enhance collaboration, and maintain high levels of observability and security.
- Streamlined Development and Deployment: Quix Cloud simplifies the development and deployment of data pipelines with its integrated online code editors, CI/CD tools, and YAML synchronization features.
- Enhanced Collaboration: The platform allows multiple users to collaborate efficiently, manage permissions, and maintain visibility over projects and environments.
- Comprehensive Monitoring and Observability: Real-time logs, metrics, and data explorers provide deep insights into the performance and status of your pipelines, enabling proactive management.
- Scalability and Flexibility: Easily scale resources and manage multiple environments, making it suitable for both small teams and large organizations.
- Security and Compliance: Securely manage secrets and ensure compliance with dedicated infrastructure and SLA options.
- Fully Managed Infrastructure: Isolated cloud infrastructure, managed Kafka or BYO broker, topics management, and YAML-based infrastructure as code.
Next steps
-
Time to level up?
Deploy your local pipeline to the Cloud, for scalability, observability, and even more Quix magic.
Or
-
Continue debugging your pipeline with the CLI
Continue learning how to use Quix CLI to develop you pipeline locally.