Quickstart - Deploy your local pipeline to Quix Cloud
Welcome to the Quickstart guide for deploying your local pipeline to Quix Cloud.
In this tutorial, we'll walk you through the seamless process of transitioning your local pipeline to Quix Cloud unlocking the full potential of your data processing workflows.
With Quix Cloud, you can focus on developing and refining your pipeline without worrying about infrastructure management. Whether you're a small team or a large enterprise, Quix Cloud provides the flexibility and scalability you need to accelerate your pipeline development and deployment processes.
If you're new to Quix Cloud or need a refresher on its features, learn more here.
Prerequisites
Important
Before proceeding, ensure you've completed the Quix CLI Quickstart.
Step 1: Sign in to Quix Cloud
Start for free
Book a session with us to start for free.
We will create a time-limited free account for you, and our experts will help you get started with your specific use case.
After you sign in, you'll be taken to the Welcome to Quix dialog, where you can create a new project, as shown in the next step.
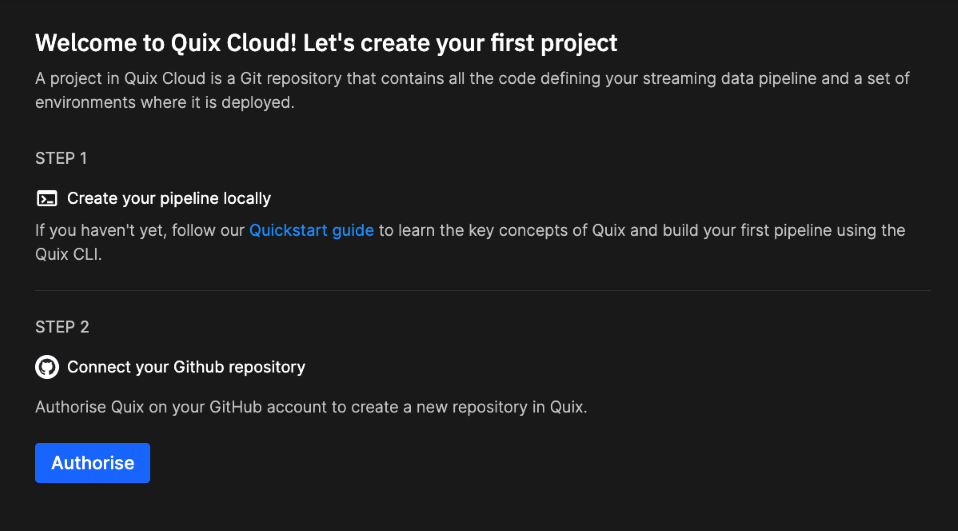
Step 2: Create your first project
You're now ready to create your first project.
- Click
Authoriseto connect your Github account to Quix. - Select the account that you used during the Quix CLI Quickstart to install the QuixIntegration application.
- Select which repositories you wish to authorise access to (select at least the one containing the Quix pipeline code)
- Click
Install & Authorize. - Select the Git repository used during the Quix CLI Quickstart from the list provided.
- Click
Create project.
Step 3: Create an environment for your project
Now, create an environment where the pipeline will be deployed.
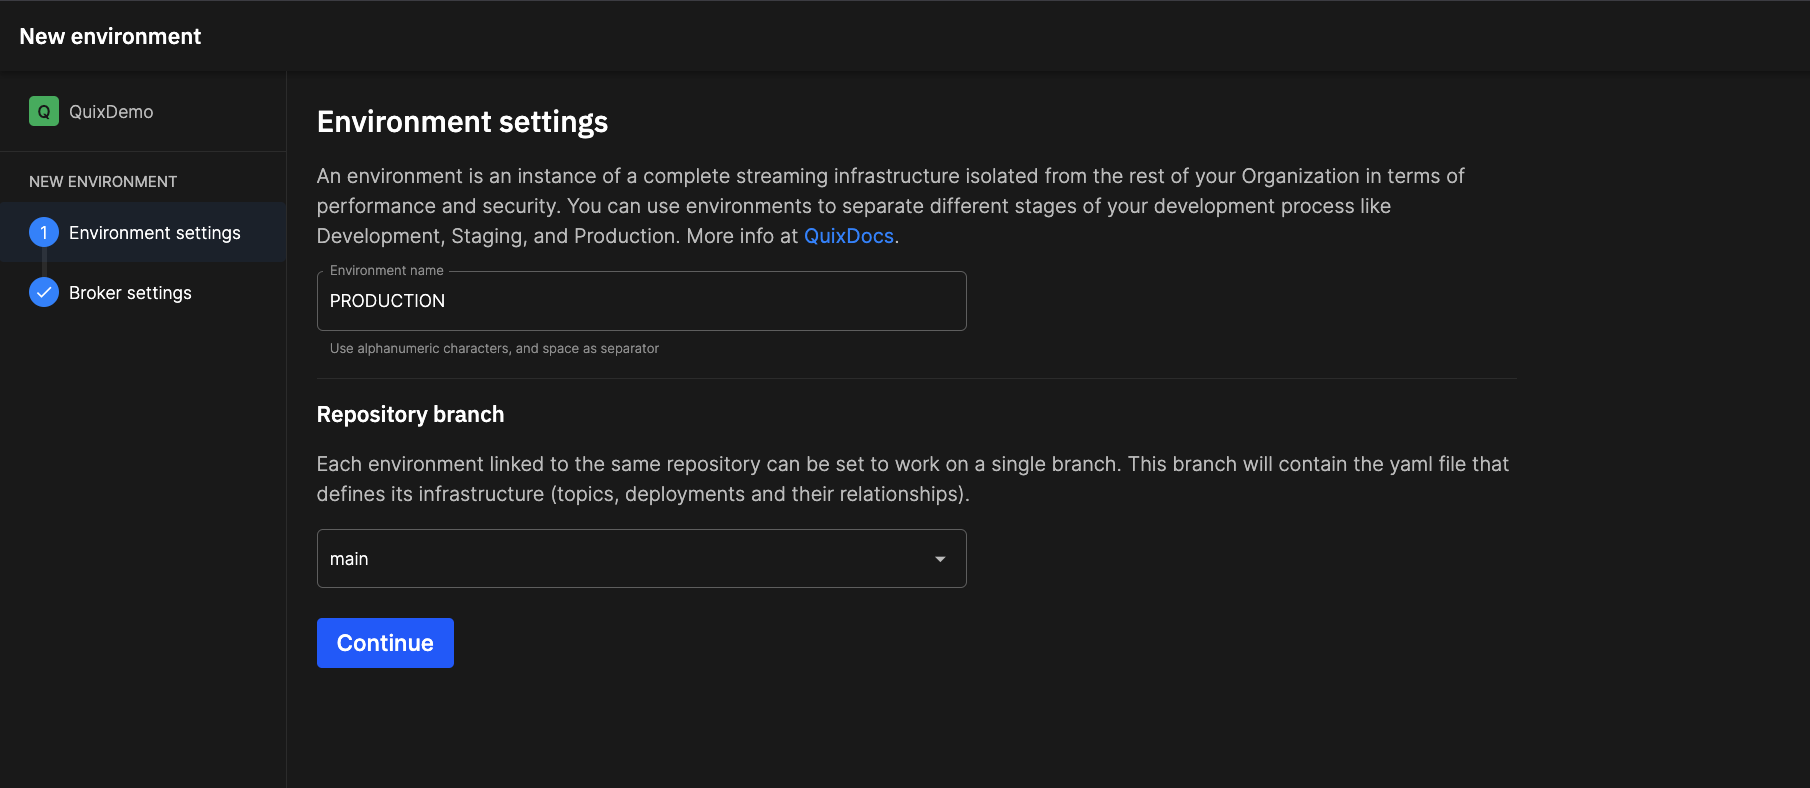
- Enter "PRODUCTION" as the environment name.
- Make sure the
mainbranch is selected. -
Click
Continue.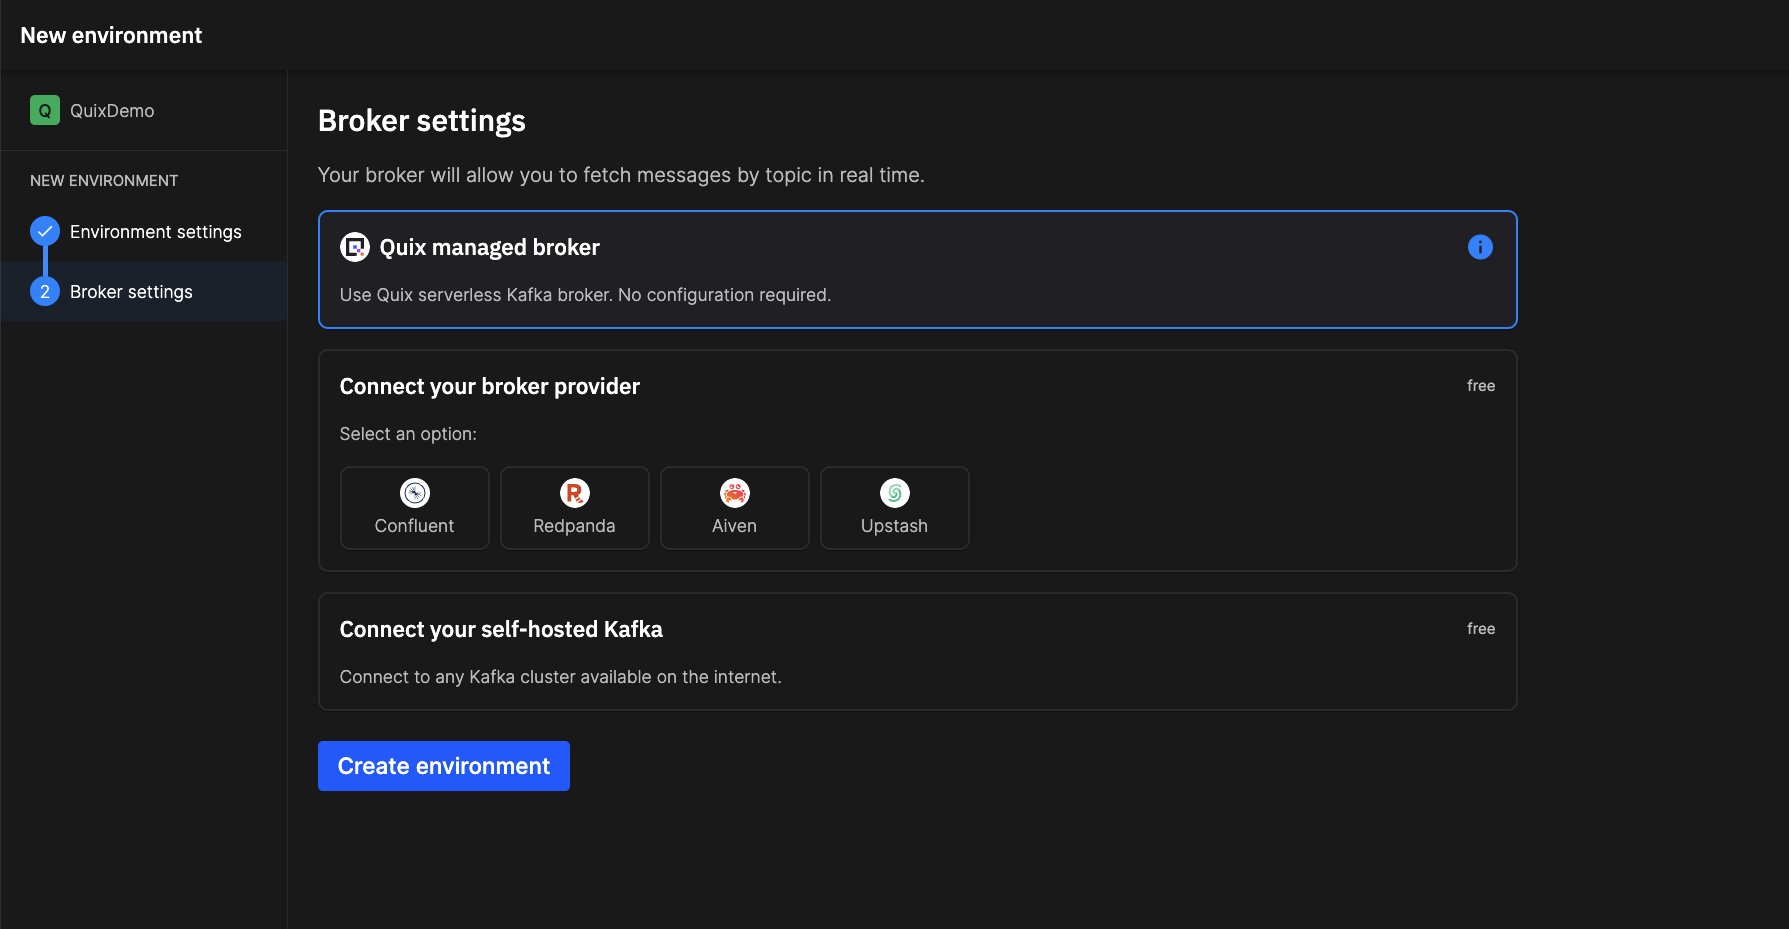
-
Select the "Quix managed broker".
- Click
Create environment. After the environment is fully created you are taken to your pipeline view.
Step 4: Synchronize your Quix environment
Let's apply some magic now. We'll synchronize the code and YAML files from your Git repository with your environment, setting up all the necessary resources to start running your pipeline.
To synchronize your environment with your Git repository, click the Sync environment button, which is located in the center of the screen.

You'll be shown the Sync to this commit dialog. View the changes that are to be made and then click Sync to this commit.

In the pipeline view you can see your pipeline running:

🎉🎉 Congratulations! Your pipeline is now deployed and running in the cloud! 🎉🎉
Step 5: View a deployment running in Quix Cloud
In your pipeline view, click on the event-detection-transformation service panel.
You'll now see how much additional observability Quix Cloud gives you:

Here you can explore the complete information of the service, including CPU and memory utilization, topics being used, live data, logging, and much more.
Step 6: Explore the Messages tab
You can even explore individual Kafka messages being published to topics.
Click the Messages tab. This service has two topics associated with it, the input and output topics. Let's view the messages on the output topic.
In the TOPIC drop down, select the output topic hard-braking.
Click on a message to see its details:
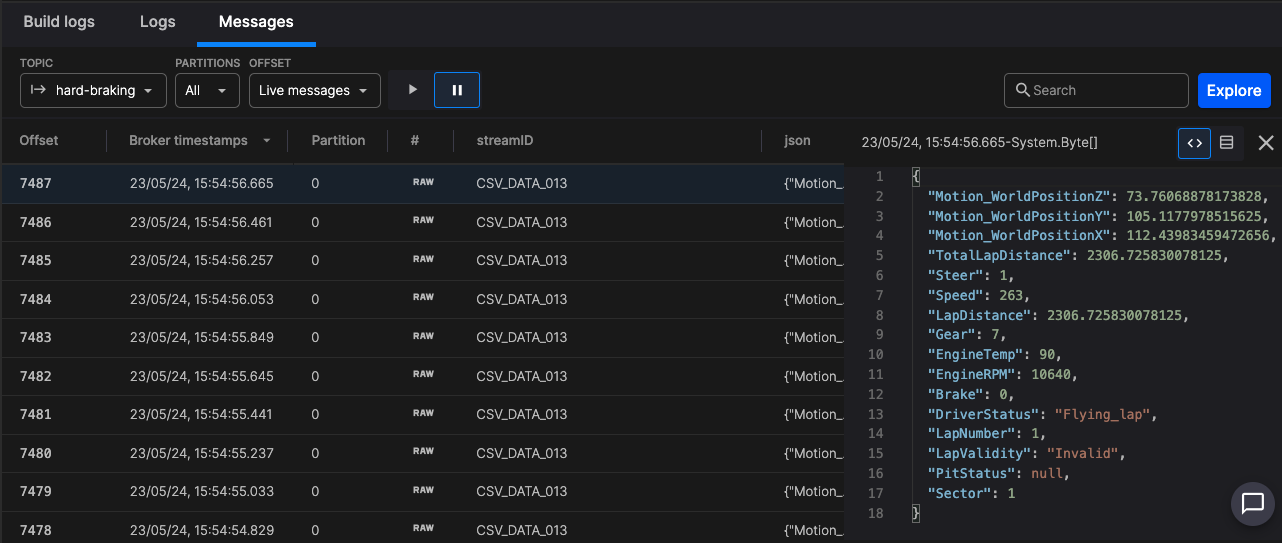
You can see the JSON for the message.
You also have access to powerful tools, such as the OFFSET drop down, where you can select to view historical messages for example. If you view historical messages, and want to go back to seeing messages in real time, simply select Live messages from the drop down.
Feel free to explore further.
Next steps
-
Quix Cloud tour
Continue exploring Quix Cloud features.
-
Deploy a Connector
Deploy a connector to interface with an external system.