Web UI
Danger
This tutorial is out of date. Please check the tutorials overview for our latest tutorials.
In this part of the tutorial you learn about the web UI service.
This provides the rather fancy interface for you to interact with this project.
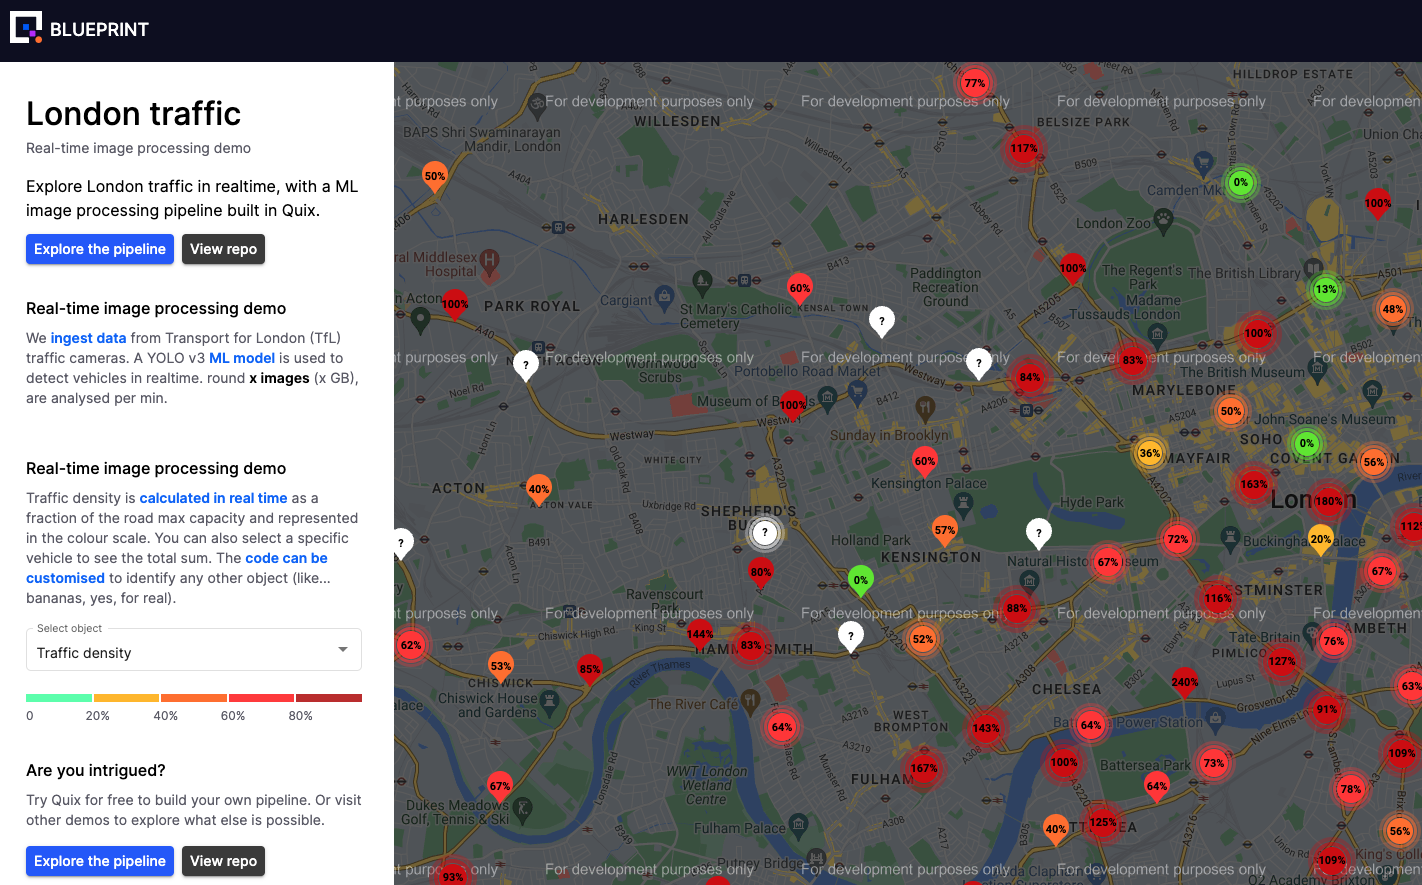
The following screenshot shows vehicle density at various points in London:
💡 Key ideas
The key ideas on this page:
- How a web client can read data from a Quix topic using Quix Streaming Reader API
- WebSockets as a way of streaming data into a web client
- Microsoft SignalR is the WebSockets technology used in the Streaming Reader API
- Access an external web application from the pipeline view
What it does
The key thing this service does is provide a UI that enables you to see vehicle data in real time, displayed on a Google map.
The UI is an Angular web client written using Typescript. The most important thing to understand is how this service obtains data from the Quix pipeline. This is done through use of the Quix Streaming Reader API.
The Streaming Reader API has both an HTTP and WebSockets interface you can use to interface with a Quix topic. This web client uses the WebSockets interface. This enables data to be streamed from the Quix topic into the web client with good performance. This is a more efficient method than using the request-response method of HTTP.
The WebSockets interface uses Microsoft SignalR technology. You can read more about that in the Quix SignalR documentation for the Reader API.
In essence the code to read a topic needs to:
- Connect to Quix SignalR hub.
- The web UI reads parameter data rather than event data, as that is the format used for inbound data in this case.
- Handle "parameter data received" events using a callback.
The web UI code to do this is similar to the following:
ngAfterViewInit(): void {
this.getInitialData();

this.quixService.initCompleted$.subscribe((topicName) => {
    this._topicName = topicName;

    this.quixService.ConnectToQuix().then(connection => {
    this.connection = connection;
    this.connection.on('ParameterDataReceived', (data: ParameterData) => {
        this._parameterDataReceived$.next(data);
    });
    this.subscribeToData();

    this.connection.onreconnected((connectionId?: string) => {
        if (connectionId) this.subscribeToData();
    });
    });
});
So, simplifying, after connection to the Quix topic, on a ParameterDataReceived event, the corresponding callback (event) handler is invoked. There are other events that can be subscribed to. You can read more about events and subscription in the subscription and event documentation.
Note
A web client can also write data into a Quix topic using the Quix Streaming Writer API, but in this app you only consume (read) data.
The data read from the topic is as follows:
{
  "Epoch": 0,
  "Timestamps": [
    1693573934793346000
  ],
  "NumericValues": {
    "car": [
      7
    ],
    "traffic light": [
      1
    ],
    "person": [
      3
    ],
    "lat": [
      51.5107
    ],
    "lon": [
      -0.11512
    ],
    "delta": [
      -4.353343725204468
    ]
  },
  "StringValues": {
    "image": [
        "iVBO…to/v37HG18UyZ1Qz/fby/<snipped>+yXUGc5UVWZfIHnX0iqM6aEAAAAASUVORK5CYII="
    ]
  },
  "TagValues": {
    "parent_streamId": [
      "JamCams_00001.02500"
    ]
  }
}
The interesting thing here is that the detected object image to be displayed by the UI is passed to it in Base64 encoded format, as the HTTP interface of the streaming reader API is being used.
Understand the code
You learned how to explore the code for a service in previous parts of this tutorial. The web UI is a fairly standard web client using Angular.
For more details on using the Quix Streaming Reader API see the API documentation.
👩🔬 Lab - Explore the UI
If you have not done so, explore the web UI.
Have fun!
See also
For more information refer to:
- Quix Streaming Reader API - read about the API used by clients external to Quix to read data from a Quix topic.


